BLASTIN AND CASTIN - PART 4
PART 3 REVIEW:
Just a refresher of what we covered in our third part of this series:
- Script to remove emails from mailboxes
- Sandbox Sample Retrieval
- Enabling Email Controls
AUTOMATION IN ACTION
This last post in our phishing series walks through a real phishing campaign to really show the power behind this solution both in the ability to identify and remediate malicious emails quickly and efficiently.
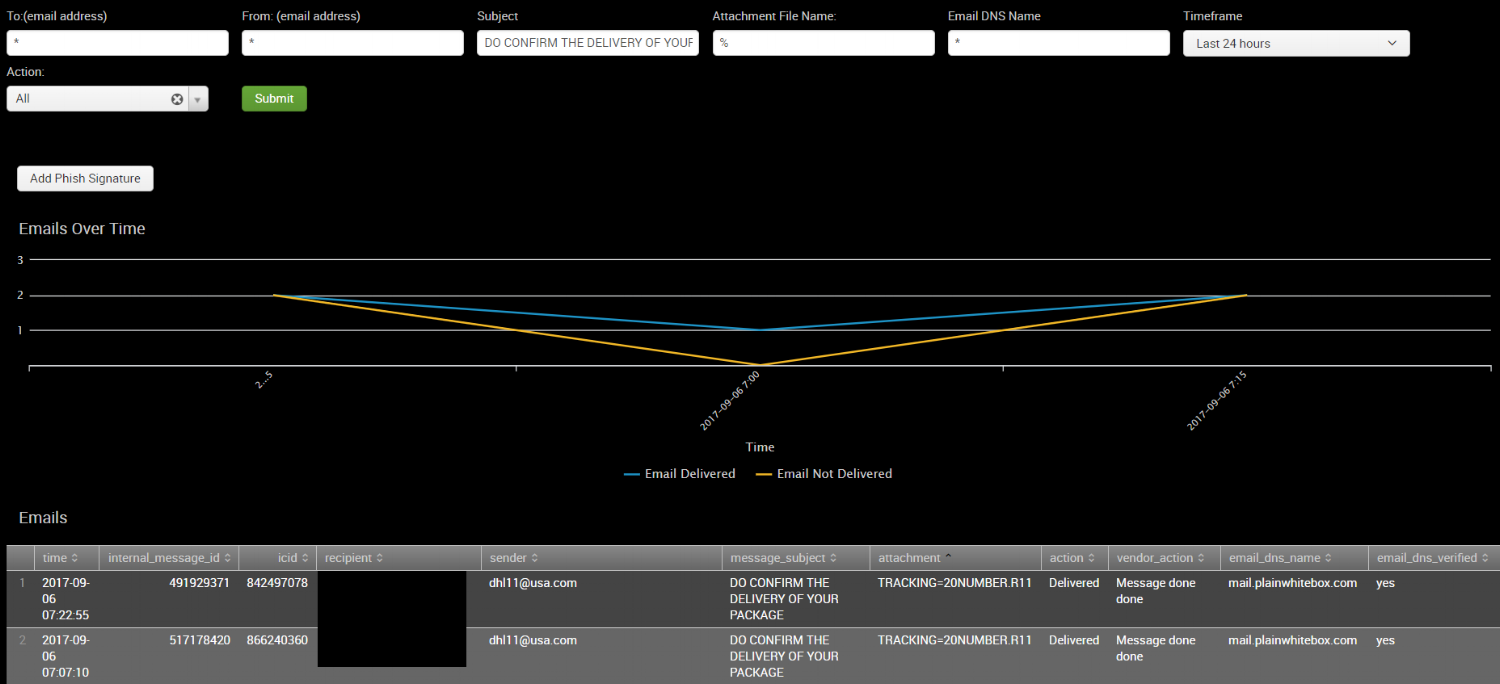
In this example, we noticed a potential phish on our Phishing Insight dashboard. We were hoping to demonstrate a phishing notable in this post but have realized our controls are doing even better than we thought so phishing notables been that unspoken "Q" word lately.

From here, we copied the subject and pasted it into our email searcher.
From an automation perspective, we also made this action into a Workflow Action off of the Splunk Notables page. This screen clip is not from the same phish, but shows how easy it is to search for this message.

We can also click to search by Sender:

Clicking either of these workflow actions launches a new Email Searcher tab and populates the fields for us:

Back to our original phish. We left off with having run the Email Searcher to determine who received this suspicious email. From that result screen, we can click to download a CSV with the recipients.
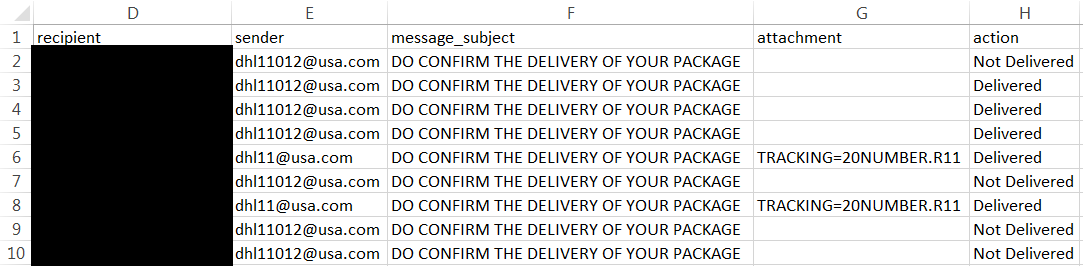
The next step is to run our PowerShell script to determine if these messages are in any users' Exchange mailboxes. I saved the file locally and launched my PowerShell command to search by Subject in this case.


It found the message in some of the users' mailboxes. From here, I want to check out a sample of the email to verify if it is a phish or not. Our script pulls back the first email it finds and archives a copy of it for us to analyze in our shared mailbox. This is a lot faster and a lot safer than asking the user for a copy.

Definitely a phish. The next step is to quickly remove it before users have a chance to click. I run the same PowerShell command, just using the "Delete" switch rather than the "Summarize" switch.


Deleted. Our last step is to add this email to our Phishing Signature list so we can pull metrics and determine control adjustments. We have made this very easy by adding a button to the Email Searcher page that I already have up. This button launches the Phishing Signature page and populates it with information.


I can adjust the information as well as determine the Attack Type and hit submit. That entry is logged with the date and my user id in case anyone has any questions about it.
In addition to the Phish Signature button on the Email Searcher page, we also added this Workflow Action to the notable screen as well.

The Action menu also provides the ability to add that email to the whitelist. This allows us to tune out noise from emails we have already analyzed. It launches the whitelist and populates the fields automatically.
SUMMARY
This whole cleanup process only takes a couple minutes once a phish is identified using one of our indicators. It has enabled us to eliminate the threat automatically rather than having the user make a decision. Our infection rate has dropped dramatically, allowing us to focus more time on threat hunting and control development vs incident response.
Our next blog series will be focused around some of our automation around Data Exfil. We have some really interesting searches to share and hope you will find value in them like we have.